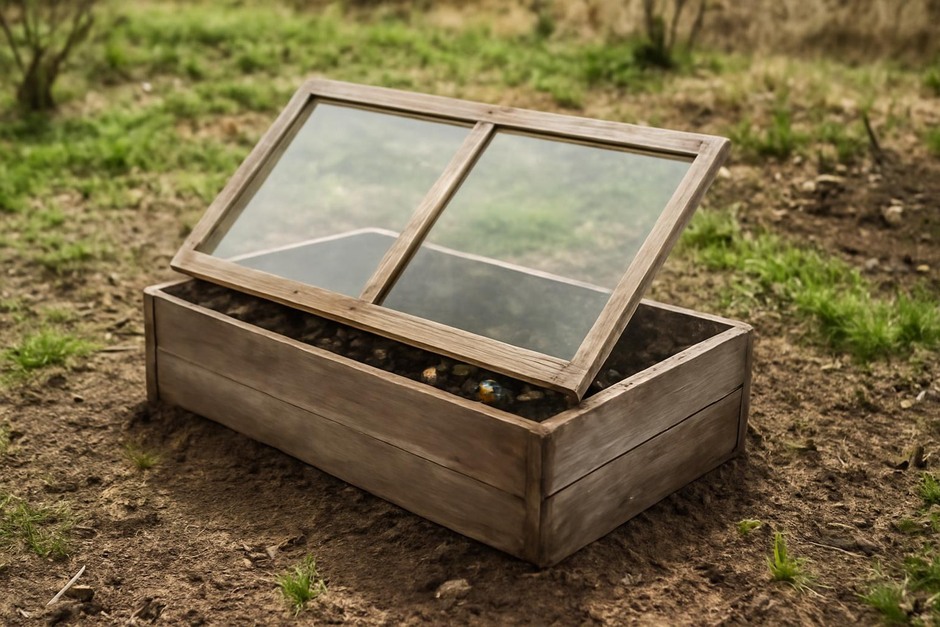
Building a Simple Cold Frame: A Historical Method for Seasonal Gardening
Introduction: From Kitchen Gardens to Modern Plots
Cold frames are among the oldest garden aids still in everyday use. In northern Europe, simple glazed boxes warmed by the sun kept tender greens going through cool springs and extended harvests into autumn. The basic idea is unchanged: trap solar heat and shelter plants from wind and frost while allowing air, light, and easy access. Below is a modest, historically inspired method to build a cold frame using reclaimed wood and a salvaged window, followed by practical variations and a troubleshooting guide for common problems.
Step-by-Step Method: Build a Basic Cold Frame
- Choose the site.
Pick a level, well-drained spot that receives full sun for most of the day—south-facing if you are in the northern hemisphere. Consider proximity to water and convenience for daily checks.
- Gather materials.
A simple frame requires: four pieces of wood for the sides (2x6s or reclaimed timbers), a hinged lid (a single-pane window or polycarbonate sheet), exterior screws or nails, weatherproofing (linseed oil or exterior paint), and simple hinges. Reclaimed windows and old barn boards work well and echo the historical approach of repurposing household materials.
- Determine dimensions.
For a bench-height frame, aim for about 1.2–1.5 m long, 0.6–0.8 m wide, and 30–45 cm high at the back, sloping to 20–25 cm at the front. The slope helps capture sunlight and shed water. Adjust sizes to fit your available materials and the window pane you’ll use for the lid.
- Assemble the base.
Cut and join the side pieces into a rectangular box. Use exterior screws to attach corners; add a central support if the span is long. If you prefer, leave the bottom open—cold frames traditionally sit directly on the ground to allow roots to interact with native soil.
- Prepare and attach the lid.
If using a reclaimed window, clean and inspect the glazing. Attach hinges to the back edge of the frame and to the window sash so it opens toward you. If using polycarbonate, affix it to a lightweight wooden frame first. Add a simple prop to hold the lid open at different angles for ventilation.
- Weatherproof the frame.
Rub a coat of linseed oil into the wood or paint the exterior with an outdoor paint to extend lifespan. Avoid heavy sealants inside the frame where plants will be grown; a traditional approach is to oil the outside and let the interior season naturally.
- Fill and plant.
Loosen the soil inside the frame and enrich it with a handful of compost. Plant seedlings or sow direct, keeping moderation in mind: small frames warm quickly but can also dry out. Begin with hardy salad greens, brassicas, or chard in spring and late summer sowings.
Variations
- Low vs. tall frames: Low, close-to-ground frames hold heat well and are suitable for overwintering root crops. Taller frames allow easier access and can accommodate small pots or trays.
- Materials: Glass windows give the most traditional look and good light transmission. Polycarbonate is lighter and safer in windy sites. For a rustic option, use reclaimed shutters or clamshell lids.
- Insulation tweaks: In colder regions, add a removable insulating board or straw bales around sides for overnight protection. Historically, gardeners used cloches and straw to extend warmth; modern builders can use foam boards temporarily when frost risk is high.
- Mobile frames: Small frames on skids or with handles can be moved to follow sun or shelter delicate plants from storms—handy for courtyard gardens.
Troubleshooting
- Too hot on sunny days: Ventilate by propping the lid open during warm midday hours. Use a simple wooden prop or an automatic opener if you prefer hands-free operation.
- Condensation and fungal issues: High humidity can invite mold. Improve air circulation by opening the lid during dry parts of the day and avoid overwatering. Thin seedlings to reduce crowding.
- Rotting wood or failing hinges: Inspect the base each season. Replace affected boards, and use stainless or galvanized hardware for longer life if the frame sits in a damp spot.
- Pests and critters: Small mammals may seek shelter under frames. Sit the cold frame directly on the soil and tuck a short strip of wire mesh beneath the sides if rodent access is a concern.
- Insufficient warmth in deep winter: For true frost protection, add a layer of horticultural fleece inside or combine the cold frame with a cloche over particularly tender plants. Remember that cold frames extend but do not entirely replace greenhouse-level heating.
A cold frame is a compact, low-tech tool with deep historical roots and modern usefulness. Built from simple materials and tuned to your garden’s needs, it can lengthen seasons, protect young plants, and bring the rhythm of outdoor growing into even a small plot. With a few seasonal adjustments and some routine checks, your cold frame can be a reliable, sustainable aid year after year.