Start Cuttings with Confidence: Three Small Experiments to Learn Plant Propagation
Propagation by stem cuttings is a practical skill that rewards a little curiosity and careful observation. These three small experiments are designed to teach one useful routine: identify a cutting, choose a method, monitor progress, and adapt the technique. Each experiment focuses on common materials and clear trade-offs, so you can decide what fits your space, plants, and patience.
How to use these experiments
Work through them in order. Each experiment takes 1–4 weeks and uses easy-to-find plants (basil, mint, coleus, pelargonium, or young shrubs). Keep a short log: date, plant, material used, conditions (light, temperature), and visible roots or new leaves. The aim is to compare results rather than chase perfection.
Experiment 1 — Water rooting: glass vs plastic
Goal: Learn to recognize early root formation and see how container material affects observation and maintenance.
Materials
- Two similar-length softwood cuttings (5–8 cm / 2–3 in), same parent plant
- One clear glass jar, one clear plastic cup
- Fresh water
- Bright, indirect light
Method
- Trim just below a node, remove lower leaves so no foliage is submerged.
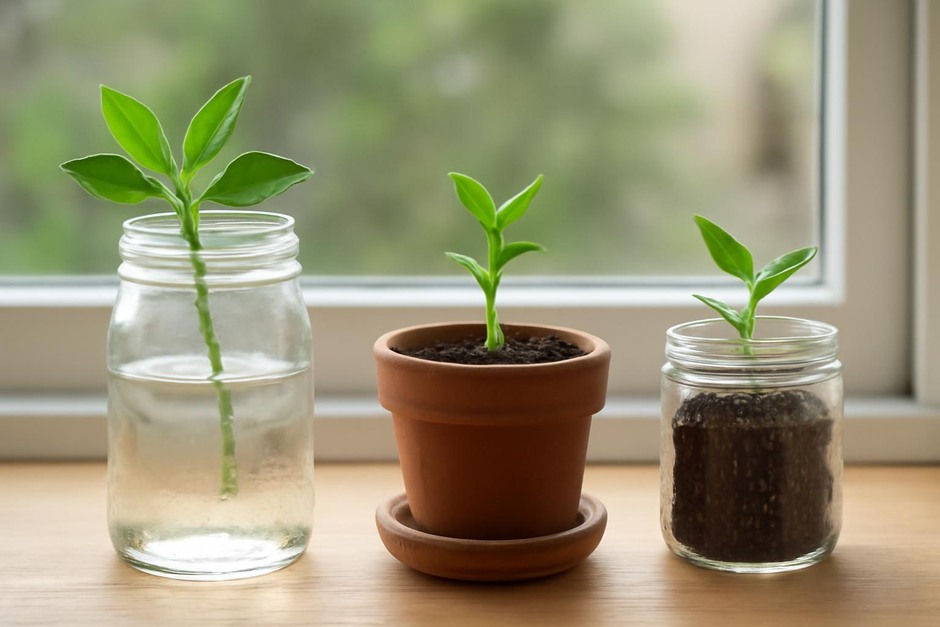
- Place one cutting in the glass jar, one in the plastic cup. Fill to cover the lowest node.
- Keep water fresh: change every 3–4 days. Observe and log daily: clarity, root nubs, any rot.
What to observe and trade-offs
- Glass: Easier to see early root hairs and water clarity; heavier and more stable; easier to clean.
- Plastic: Lightweight and inexpensive; may scratch or cloud, making inspection harder; can retain odors over time.
- Note time to first visible roots, signs of healthy white roots versus mushy tissues, and how often you change water.
Experiment 2 — Soilless medium and covering: perlite vs. peat vs. sand, with or without hormone
Goal: Compare rooting speed and cleanliness of different propagation media and the effect of a rooting hormone. This moves cutting care from water into a medium you might use for potting on.
Materials
- Six uniform cuttings of the same species
- Small, identical containers (seed trays or recycled cups)
- Three media: perlite, a peat-based mix, and coarse river sand
- A small bottle of rooting hormone (optional) and a neutral control
- Plastic dome or a clear plastic bag to create humidity
Method
- Prepare three pairs of containers, each filled with one of the media.
- Treat one cutting in each pair with rooting hormone and plant it; plant the other without hormone.
- Place half the set under a clear plastic cover to increase humidity; leave the other half uncovered.
- Keep the media lightly moist and in indirect light. Check weekly for roots and firmness.
What to observe and trade-offs
- Perlite: Excellent drainage and aeration; roots are easy to check but requires regular moisture monitoring.
- Peat-based mix: Retains moisture, gentle on cuttings; heavier and slower to dry, which can suit some species.
- Sand: Good drainage but compacts over time; works well for species that dislike excess moisture.
- Rooting hormone: Often speeds root initiation but is an extra cost and not essential for vigorous herbs; note differences in timing and root mass.
- Humidity cover: Reduces transpiration and can speed rooting, but increases disease risk if ventilation is insufficient.
Experiment 3 — Potting on and container comparison: plastic trays vs biodegradable pots vs repurposed containers
Goal: Move established cuttings to containers and evaluate ease of transplant, root development, and early growth in different pot types.
Materials
- Three cuttings that have rooted from previous experiments
- Three container types: plastic seed tray cells, biodegradable peat pots or paper pots, and a repurposed food container
- Standard potting mix and routine care
Method
- Gently remove rooted cuttings with minimal disturbance and pot each into a different container type.
- Place in similar light and water regimes. Record handling ease, root constraint, and visible growth over 2–4 weeks.
What to observe and trade-offs
- Plastic cells: Durable and reusable, good for tight nursery spacing; watch for root circling if left too long.
- Biodegradable pots: Convenient to plant directly into the ground; may dry out faster and break down unevenly.
- Repurposed containers: Cost-effective and versatile but check drainage and durability.
Wrapping up: how to interpret your experiments
Compare dates and photos in your log. Which method produced the fastest, healthiest roots? How did materials affect your workflow and the plants’ response? Use those trade-offs to choose a routine: a window-sill water stage for easy observation, a perlite or peat mix for consistent potting, and containers that match your transplanting timeline.
These small, repeatable experiments give you evidence to refine propagation for the plants you enjoy most. Keep notes, repeat with different species, and over time you’ll have a personalized method that balances speed, cost, and hands-on convenience.